Mega Menu

Mid-Year Sale
Get Up to 35% OFF!

0 Days
0 Hrs
0 Mins
0 Secs
Getting Started
Mega Menu
The Mega Menu feature allows you to create advanced, fully customizable dropdown menus using the Elementor editor. With this feature, you can design rich menu layouts that include images, columns, icons, and various content elements to enhance your website navigation and user experience.
List of Topics
- Create a Mega Menu Template
- Assign Mega Menu to a Menu Item
- Preview the Mega Menu
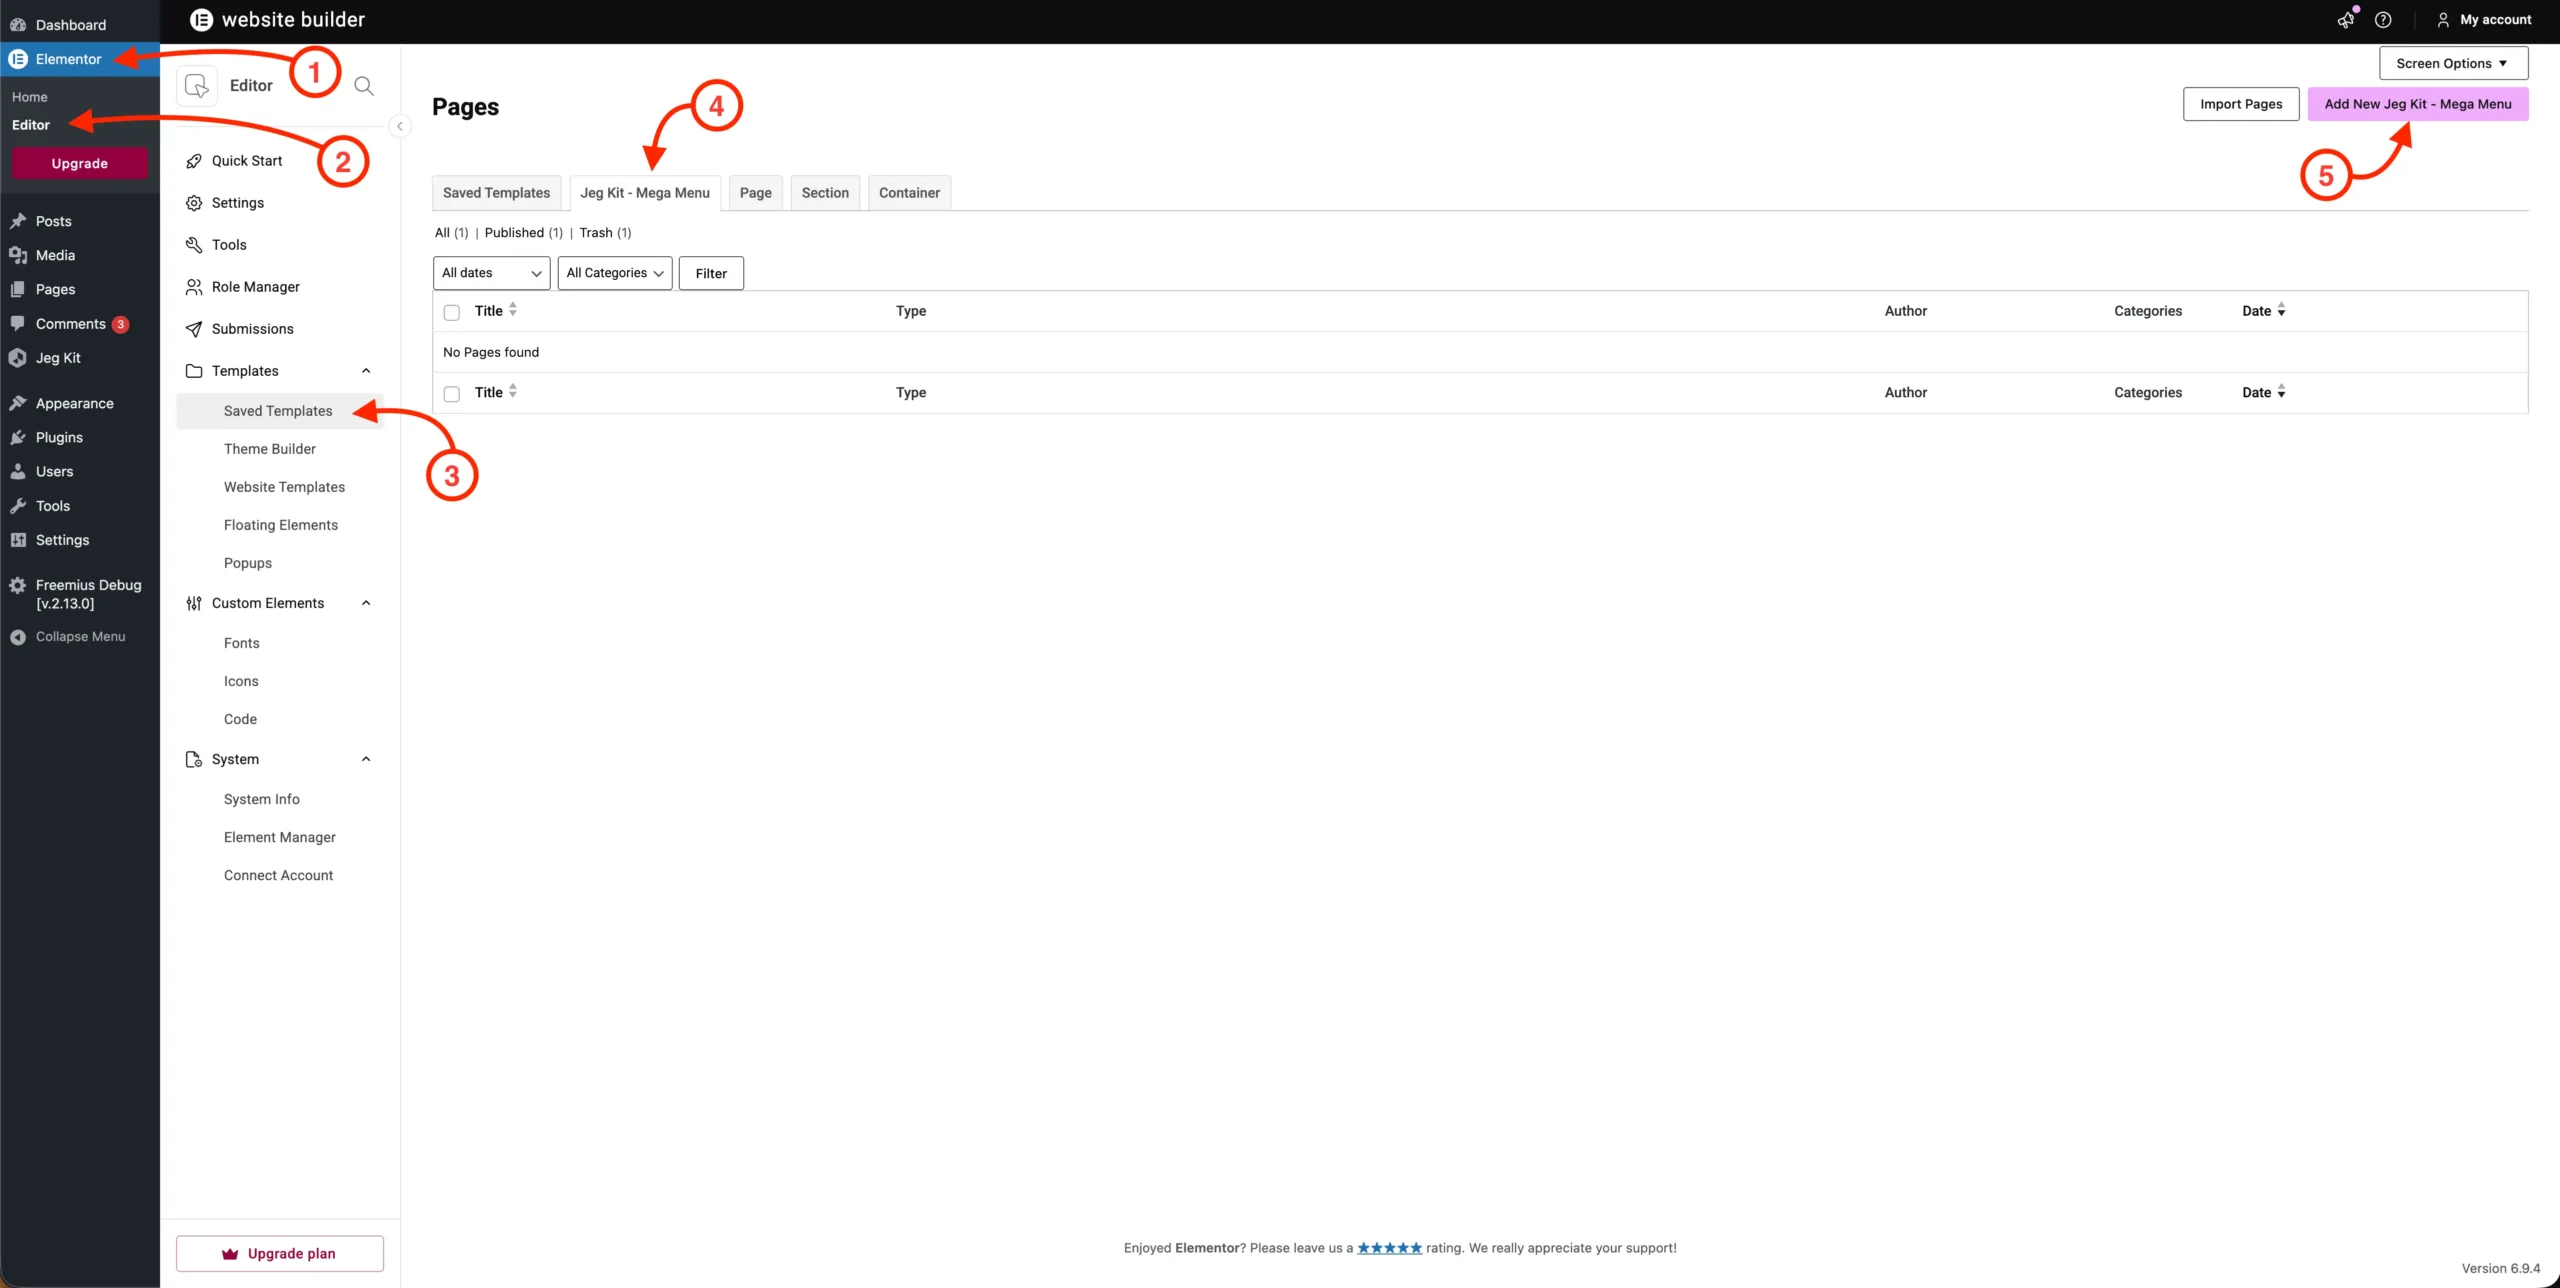
1. Create a Mega Menu Template
To create a new Mega Menu template, please follow these steps:
- Navigate to Elementor → Editor → Templates.
- Select the tab Jeg Kit – Mega Menu.
- Click the button Add New Jeg Kit – Mega Menu.
After clicking the button, a popup will appear:
- Make sure the Template is set to Jeg Kit – Mega Menu.
- Enter a name for your template.
- Click the Create Template button to proceed.
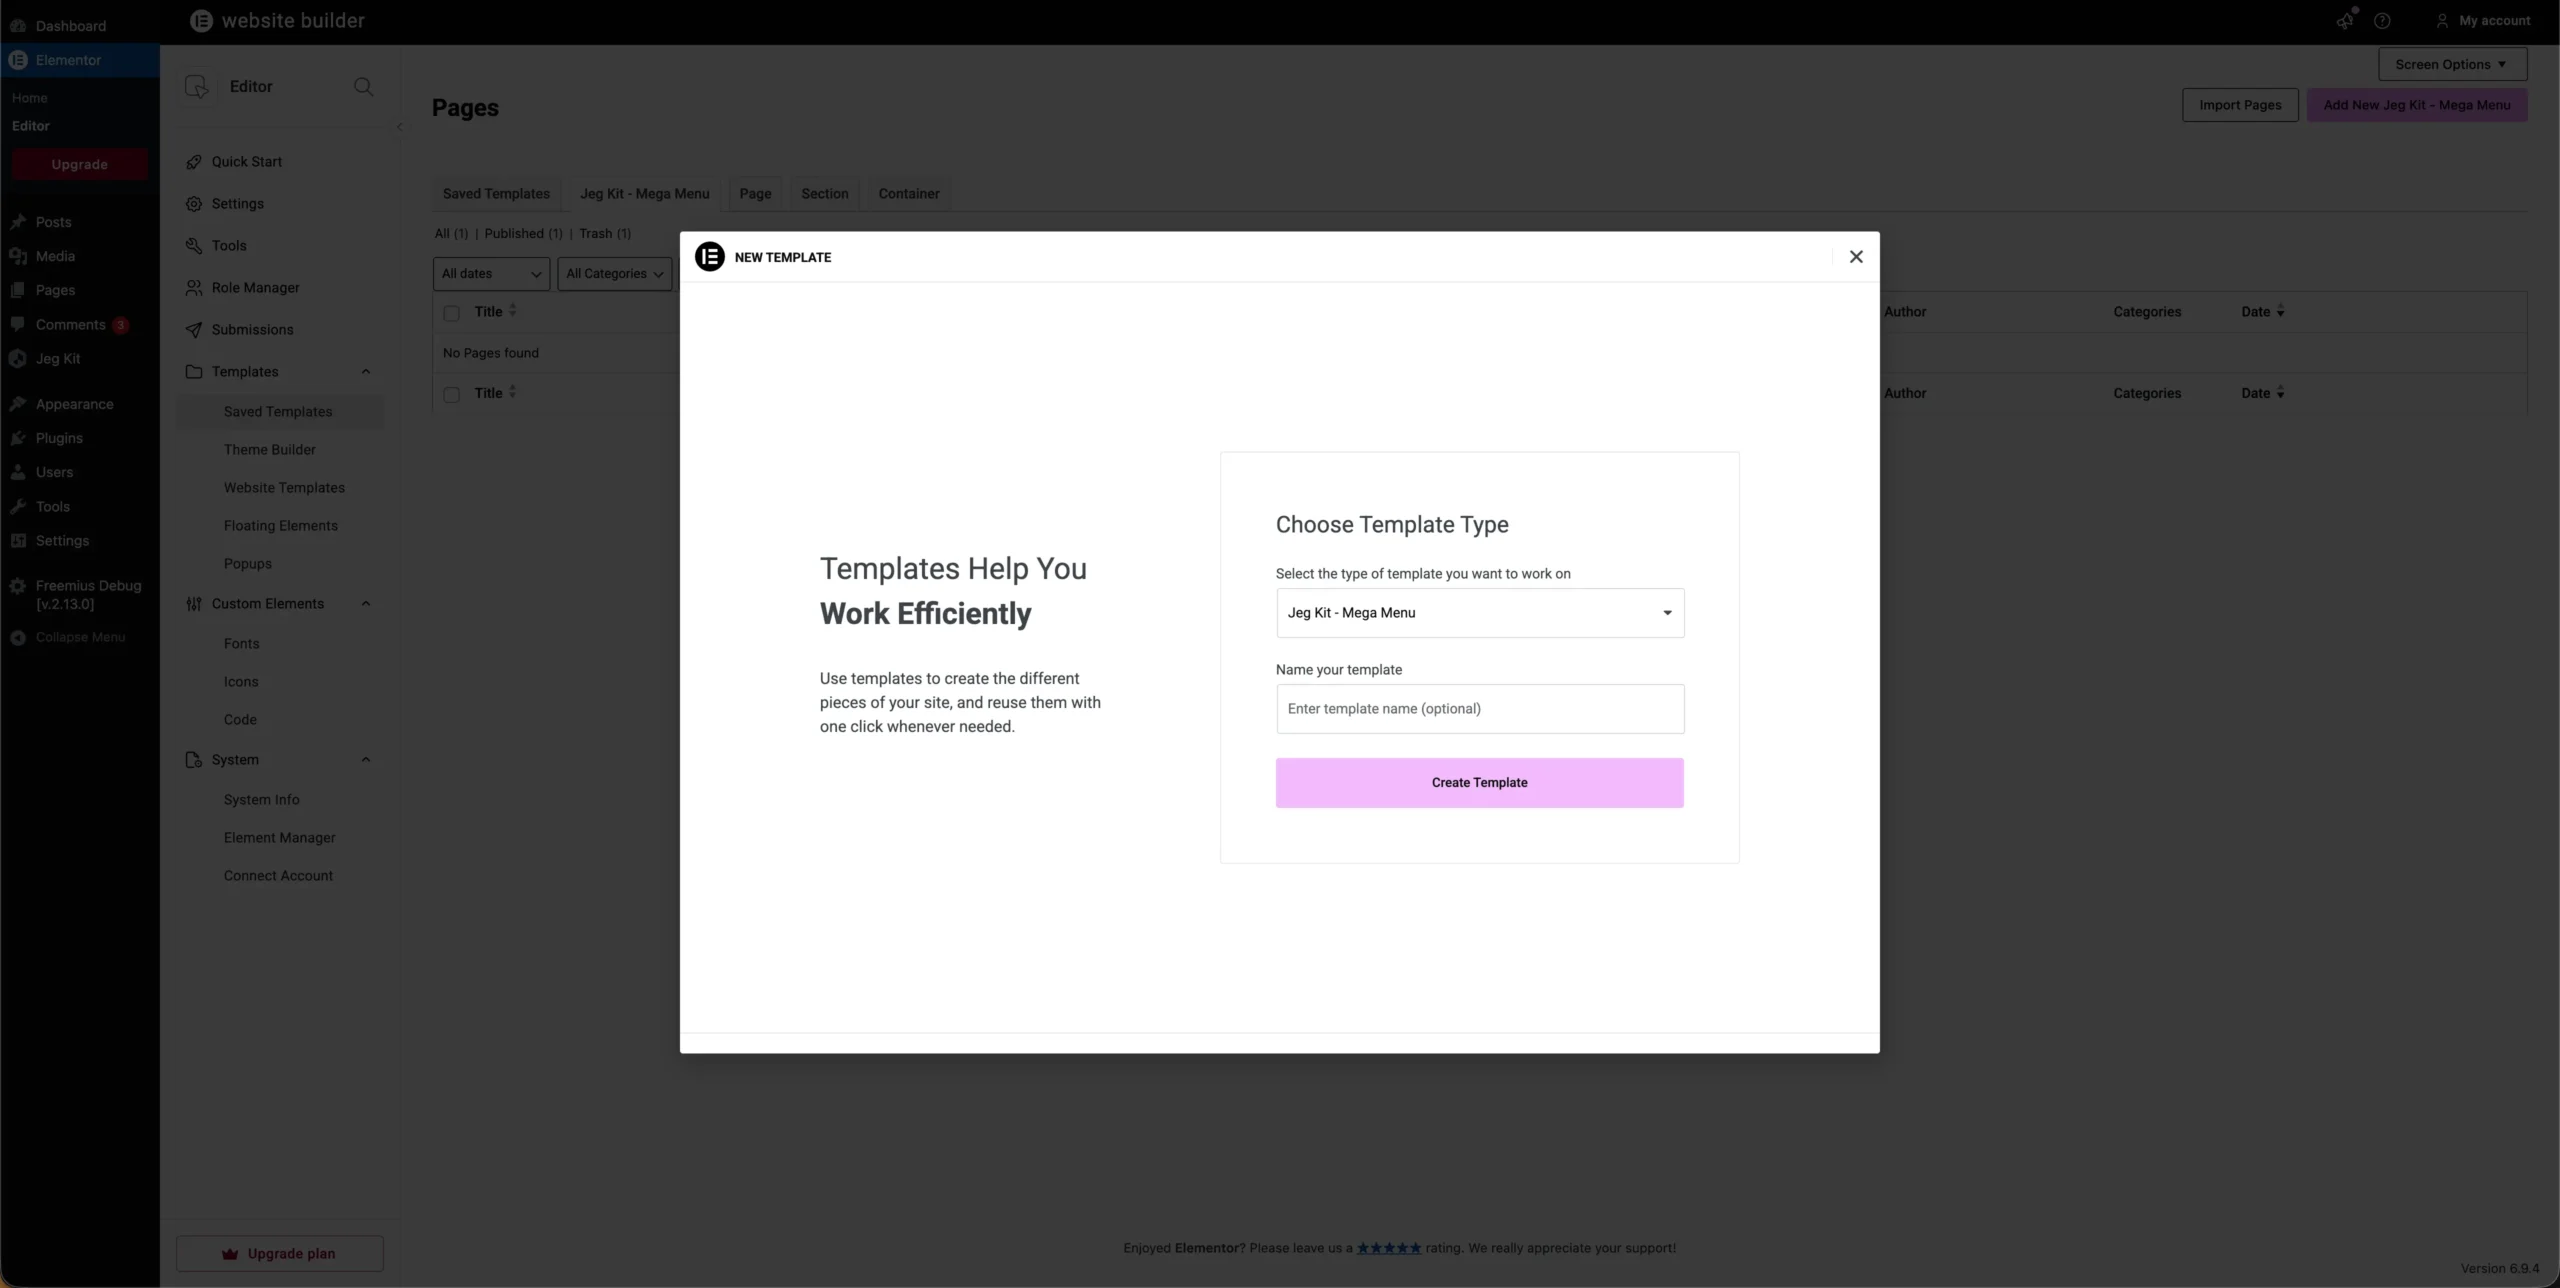
You will then be redirected to the Elementor Editor. From here, you can design your Mega Menu according to your preferences using Elementor’s drag-and-drop interface.
2. Assign Mega Menu to a Menu Item
After creating the Mega Menu template, the next step is to assign it to a menu item:
- Go to Appearance → Menus.
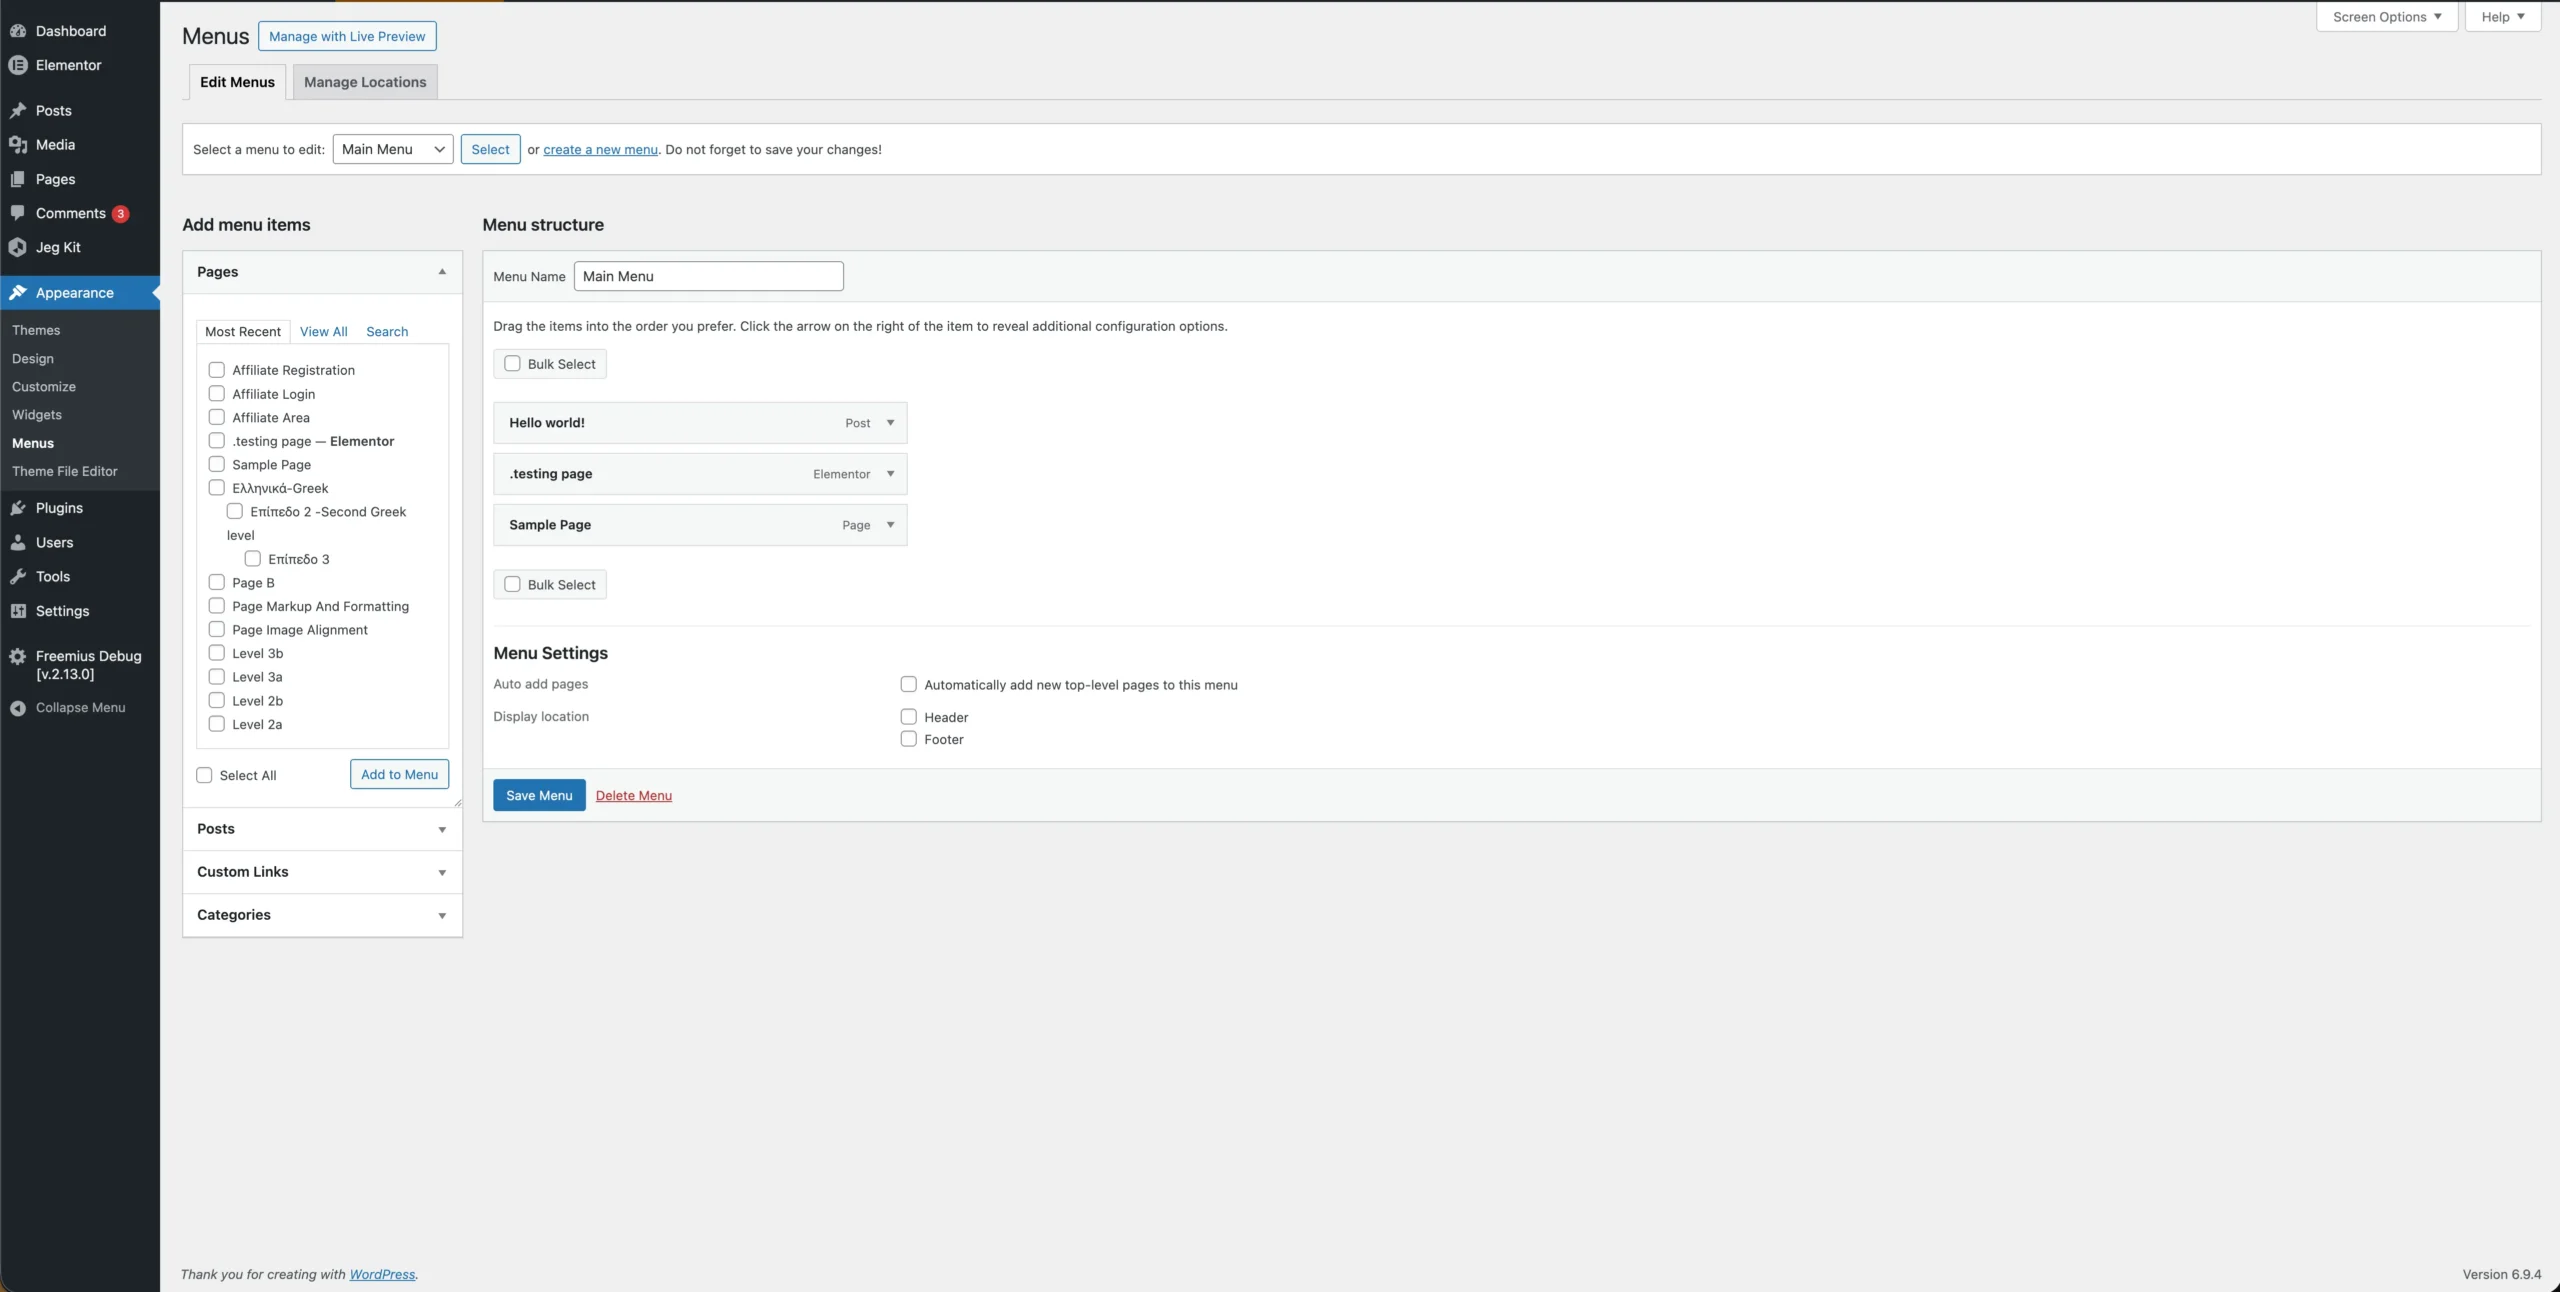
- Ensure that you have already created a menu.
- Select a Menu Item where you want to apply the Mega Menu.
- Click the menu item to expand its settings.
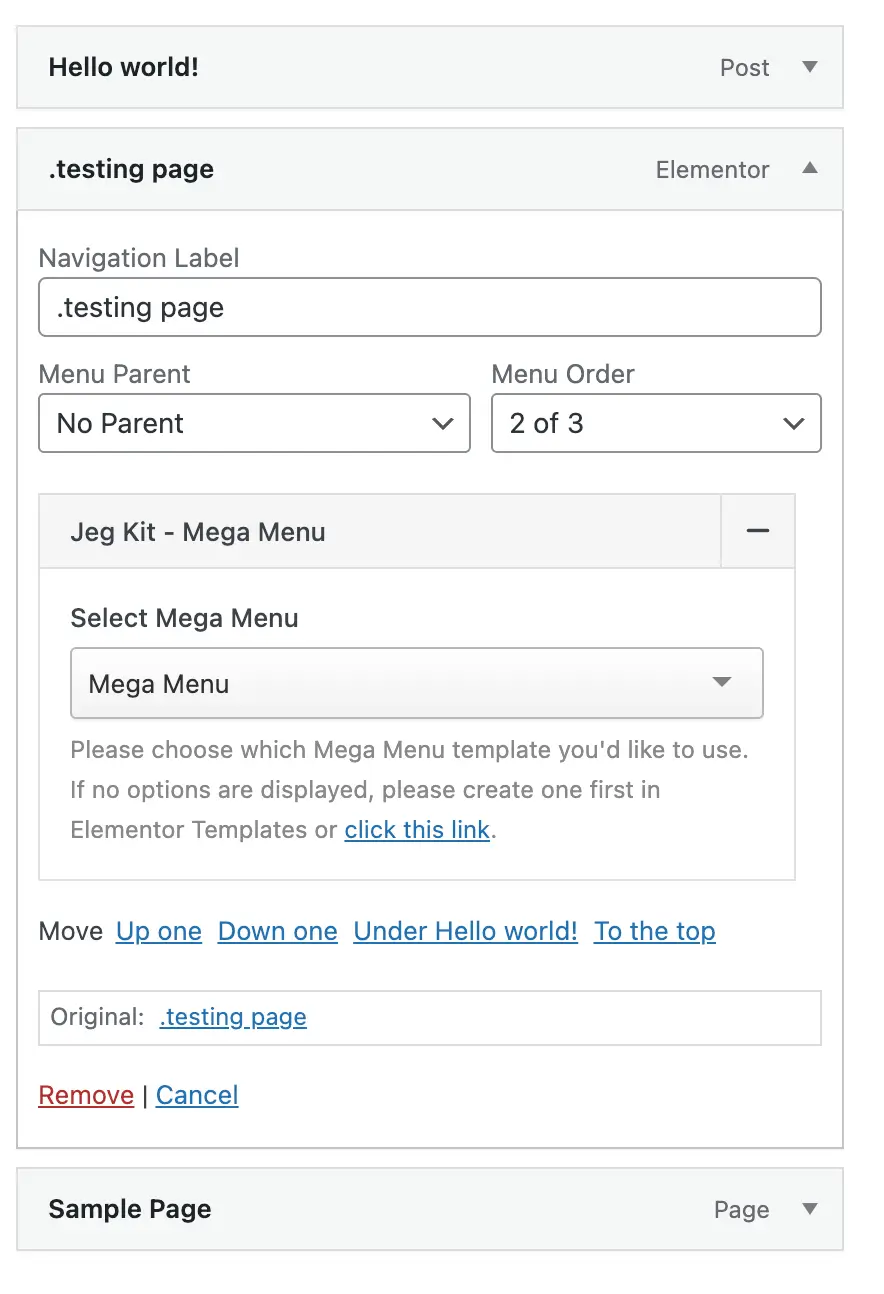
- Locate the Jeg Kit – Mega Menu tab.
- In the Select Mega Menu option, choose the template you created earlier.
3. Preview the Mega Menu
Once the Mega Menu has been assigned:
- Visit your website frontend.
- Hover over the menu item where the Mega Menu is applied.
The Mega Menu you designed should now be displayed accordingly.
Conclusion
The Mega Menu feature provides a flexible way to enhance your website navigation by allowing you to create and display fully customized menu layouts using Elementor. By following the steps above, you can easily design and implement a Mega Menu that fits your website’s needs.